Monday, June 29, 2009

Digiscoping basics 2 - Lining up the camera

"American Green-winged Teal" digiscoped Arcata, CA 4/2009
When coupling a small digital point & shoot (p&s) camera behind a scope with a zoom eyepiece you will always see some sort of vignetted dark circle around the subject. As I've stated previously this is not a big issue and it typically disappears when you increase your camera zoom. Fixed wide-angle eyepieces will often not show this vignetting, but like most scope users I prefer the versatility of the zoom.
I actually like to use this circle to tell if my camera is centered properly over the eyepiece. When centered, the blackened sections of the image will appear uniform on either side of the screen and look the same at top & bottom.

If not centered properly, the vignette will disappear from one edge but not the opposite (as above) or perhaps from all but one corner of the image as you increase scope zoom. This is a clear indicator that your camera is off center. In the example shown above, the camera is a bit too far to the right and needs to be adjusted slightly to the left for best results. Remember, that the circle we are working with is less than 4 mm wide so adjustments will be slight. These seemingly small differences will become even more problematic as you increase the scope zoom because the small circle of light leaving the eyepiece (exit pupil) may be reduced from 1/2 to 1/3 its original size when you increase the scope zoom.

With our 2 dimensional adjustments made on the flat plane from side to side, up & down, and on the diagonals, we now need to turn our attention to getting the proper distance between the camera lens and the scope eyepiece.


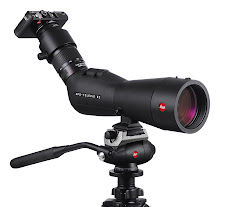
old style, generic universal digiscoping adapter

This last adjustment seems to be the one most commonly ignored or missed in many digiscoping set ups resulting in ruined photos and great frustration. In many older, well established digiscoping websites, you may find this is largely ignored, not mentioned, or may seem unnecessary or not understood by many long time digiscopers due to inherent biases of certain types of formerly popular adapters.

The sample universal adapter above is fairly typical of most early adapters that utilized filter-thread (accessory) rings on the front of the p&s cameras as a means of attachment between the camera and adapter. Unfortunately, there are almost no current p&s models that still offer accessory threads because these units are replaced so frequently that accessories really don't seem to sell. It seems each year there maybe 2 in a field of hundreds of new digital p&s cameras that both lend themselves to digiscoping and offer filter thread rings at the front of the lens. These adapters are extremely limited as a result.

Another issue with these adapters is that due to the metal rings and adapter rings present between the two lenses these adapters almost invariably meant you could never get the two lenses too close together. As a result, many sites erringly suggest you always need to get the lenses as close as possible together for best results.

blackened, semicircular arcs appear when lenses are too close together

If you get your eye too close to a binocular lens you will get "black out" sections in your view that appear as shadowed arcs near one side of the image as seen in the image above. You don't have to take my word for it, try it for yourself. twist or roll down the eyecups on your binoculars and remove your glasses if you wear them and get the binocular eyepieces as close as possible to your eyes. You should note an effect similar to what is shown above.

Well not surprisingly, the effect is the same when coupling two lenses afocally (that is mounting a camera with a lens behind an eyepiece in this case). If the two lenses are too close together, you need to draw these apart until you see a more uniform colored background. This is particularly noticeable on light backgrounds like the sky.

when lenses are too far apart you'll note darkened corners

In the image above I've purposely pulled the lenses too far apart. If you experiment with your eye and a binocular or scope you can actually predict what happens in digiscoping as the systems really aren't too terribly different. When you move your eye away from the lens, your field of view collapses leaving just a small circle of light visible. You can see this happening in the image above as well. As the lenses are drawn apart the field begins to collapse and you begin to see shadowing at each corner of your image.

Note the difference in the terms "shadowing/shadowed edge" versus "vignetting/vignetted edge", I differentiate between these two as they indicate a different problem. As I define these terms "shadowed edges" have a bit of opacity to them - that is you can see through them a bit. A "vignetted edge" is sharply defined and completely black with no opacity.


A sharply defined blackened edge or vignette indicates you are off center or simply need to run your zoom out more. Shadowed edges generally indicate the two lenses are too far apart and need to be moved closer together. Shadowed arcs that are in the interior of the frame will have a lighter section between the shadow and the edge. When seen you should move the two lenses a bit further apart.

Not the most interesting subject I realize but to save time, I just zipped out the back door and took some sample shots of my storage shed. The light doors provided a good background to show shadowing. When the lenses are adjusted properly the field should look uniform and be devoid of shadowing & vignetting.

As I travel the country and beyond teaching digiscoping classes, I find that coupling errors are responsible for a majority of common digiscoping image problems/failures. Hopefully some will find this information helpful. As always, if there are ever any questions feel free to ask in the comments section. I'll happily address all to the best of my ability.

J

Texas Wading Birds

Each year, I eagerly await my early spring trek to Galveston, TX for the annual FeatherFest bird festival. I know I will see plenty of wonderful wading birds, shorebirds, and many of the first spring migrants returning from Central and South America to breed.

Reddish Egret, white morph, digiscoped in Galveston, TX 4/09

Even living in Florida, I can't help but appreciate long-legged wading birds both for their beauty and their willingness to pose for imaging! The white-morph of the Reddish Egret is comparatively common on the West side of the Gulf of Mexico in Tx as compared to my home on the Eastern edge of the Gulf. As such it is always great to see these birds when I'm here. The bird above was photographed with a warm early morning light washing it from one side, providing a nice mix of shadow and warm golden highlights.

Yellow-crowned Night-Heron, digiscoped Galveston, TX 4/09
Yellow-crowned Night-Herons are nocturnal (more active at night) as the name implies and prefer coastal locations. They are commonly found roosting by day in mangrove bushes. The bird above is a good example of the effects of lighting in digiscoping. This image was taken after the sun had set. While I got the image, this lighting does seem to produce some odd colors not typically seen on an image taken with more and direct lighting. The camera captured an unusual rosy bloom on the belly of this bird and the steel gray back feathering is a bit too blue. With a bit more light this bird's colors would be depicted more accurately.

Green Heron digiscoped with Leica APO Televid 82 spotting scope & D-Lux 4 camera

In the image above the Green Heron was wading through a shadowed marshy area washed in direct evening light. Note the difference that direct low-angle lighting makes. The colors are vibrant and true. Photographers love this "sweet light" found within an hour or two of sunrise and sunset respectively.

Green Heron digiscoped image, Texas 4/09

From Galveston, it is a mere hop, skip, and jump (and a ferry ride) to famed High Island known far and wide for the wondrous number and variety of migrant songbirds that can occur here in spring. Fortunately, when the weather is not right to promote good migrant watching the local rookery full of Roseate Spoonbills is a great consolation!


Roseate Spoonbill, digiscoped @ High Island, TX 4/09
The birds here are often a bit distant for a lot of camera rigs, but digiscoping offers an ideal focal length. These Spoonbill images were all taken at near 1,500 mm lens equivalent.

Roseate Spoonbill digiscoped w/ Leica APO Televid 82 mm scope & D-Lux 4 camera

The bird above has not yet adopted the greenish head typical of full adult-plumaged birds and despite its considerable color is still comparatively dull.

Roseate Spoonbill adult in high breeding condition ,High Island, TX 4/09
Note the difference in color on the adult above showing the dark pink "shoulder", and "beard", lime green cap, and bright yellow facial skin. It even shows a bright orange tail (as if it weren't colorful enough).
Roseate Spoonbill digiscoped w/ Leica APO Televid 82 mm scope & D-Lux 4 camera
One good feather ruffle and it's time to attract a mate!
Roseate Spoonbill pair digiscoped in evening light, High Island rookery, TX 4/09

A pair of adults are now ready to get down to business.


American Alligator digiscoped @ High Island, TX 4/09

To help dissuade short-lensed photographers from attempting to reach the rookery island there were no fewer than 2 dozen Alligators hanging out below the nesting areas!

Alligator digiscoped w/ Leica APO Televid 82 mm spotting scope & D-Lux 4 camera

Seriously, they really were there but undoubtedly these patient creatures were simply waiting for the breeding season to kick off in earnest so the easy meals will follow. Is it me or do these birds seem to be overly pink on the insides of their mouths?... I wonder if it's their diet?... ;p

Friday, June 26, 2009

Digiscoping - yet another review of basics!

Glassing distant Frigatebirds in Trinidad

For years as a birder, I've always thought , "Wow, if only I could get a picture of that!" when seeing some great view of wildlife through a scope. Fortunately, over the past decade or so digiscoping pioneers have been perfecting a practice of coupling a small digital camera in front of a scope eyepiece to take images. The practice has been dubbed "digiscoping" and it is gaining popularity in the birding and other communities every day.

Leica C-Lux 3 camera

Sometimes the process of placing a camera with a lens behind a telescope or spotting scope is referred to as "image projection" and some digiscopers will also use the term "afocal coupling" two describe the marrying of the circle of light exiting the scope (exit pupil) to the center of the seperate camera lens.

digiscoper at work

In theory, the process is simple enough, you simply mount or hold the camera behind the eyepiece and push the shutter release button to capture your image. However, as you'd expect (or know if you've experimented with this in the past), there is a whole host of variables to control, and field craft tricks that will effect the overall quality of the resultant image. A few of the most logical are as follows:

1) Your image quality will only be as good as the weakest link of your system, so good glass in the camera and scope lenses is essential.

2) not all cameras lend themselves to digiscoping: compact point & shoot cameras with a 4x (sometimes 5x) optical zoom or less seem to be necessary to insure success. It also seems that in most cases, cameras with shorter lens extension perform better than longer-lensed models.

3) while digiscoping allows you to reach incredible levels of magnification, it is safe to say your image quality will generally be better when you are closer to your subject. A lot of atmosphere between you and a distant subject can be full of moisture, dust particles, etc. that will refract light and cause distortion.

Leica APO Televid 82 mm scope, digital adapter 3, and C-Lux camera

Centering the camera on the scope is not necessarily an easy task either, as it requires trying to line up a circle of light at the eyepiece that ranges from ~3.3 mm to 1.6 mm wide only (on the set up above). Scopes with smaller objective lenses will offer even smaller exit pupils . To make matters more complicated, you also need to find the ideal distance between the eyepiece and the camera lens for best results. Due to this, use of an adapter to hold the camera in the proper location is highly recommended.

Leica D-Lux 4 camera

Small digital p&s cameras typical default to a wide-angle view at start up - often near 20-28 mm equivalent. As such, when mounted behind any manufacturers' zoom eyepiece you will see vignetting, a darkened circle around the subject as shown below.

Green-winged Teal, digiscoped with Leica APO Televid 82 mm, showing vignetting

To eliminate vignetting, most digiscopers will run the zoom on the camera up to until the dark circular frame disappears and they get a full-frame rectangular image. With Leica's revolutionary wide-angle 25-50x zoom, this typically requires running the camera zoom up to near the 1x mark (on most cameras I've tried), while other eyepieces with narrower fields of view typical require near 2x magnification on the camera zoom.

With the right camera, you can actually utilize the entire range of magnification on both camera & scope zoom to reach incredible magnifications not typically available in other photographic systems. For example look at the dramatic "before & after" examples provided below. The first image shows how the subject appeared to the unaided eye (e.g. taken at ~50mm lens equivalent).

adult White Ibis as seen with the naked eye
The image below shows the same subject from the same location, with the camera lens and spotting scope zoomed to maximum power.
adult White Ibis digiscoped w/ APO Televid 82 mm scope and Leica D-Lux 4 camera

The image above was taken with the Leica D-Lux camera at full zoom (telephoto) which is the equivalent of a 60 mm lens. Not a lot of power by itself, but when mounted behind the scope this level of magnification is multiplied by the power of magnification on the scope. In this case the scope eyepiece was set to 50x, meaning this image was taken at the equivalent of a 3,000 mm lens (50x 60 mm)! This is amazing since the largest telephoto lens commercially available in most cases is an 800 mm! This digiscoping setup offers nearly 4x the magnification of a very long, heavy, and expensive lens!

I will provide more digiscoping topics in the near future and will try to get increasingly sophisticated to help users of all levels. Just remember, as with anything, practice makes perfect, best to simply have fun and be patient. Feel free to utilize the comment section with questions and perhaps we can get some good information flowing here!

Thursday, June 25, 2009

Backyard Bonus Birds!

Eastern Screech-Owl (red) digiscoped w/APO Televid 82 scope & D-Lux4 camera


I first noted her in the nest box in February 2009. I'd had Screech-Owls nest in the backyard box almost every other year, but until now I'd never had a red plumaged female! These birds were far more shy than birds in past year, only really showing themselves at night and emitting soft calls. The smaller male bird was gray and was very hesitant to show himself, but again we knew he was around due to his continued calls. None-the-less, I wondered if they would be successful knowing that the yard would get a lot of traffic.


female Eastern Screech-Owl delivers a partially eaten Brown Anole, 5/4/09


During the hectic spring migration, I didn't have much time to check the box and for a while I thought the nest had failed. Surely by this point if there had been young in the box, the female would be roosting in the mouth of the box to get a break from the restless youngster(s) inside.

female Eastern Screech-Owl image taken with Leica V-Lux camera 5/4/09

Then one night in early May there was a new noise. An incessant high-pitched chittering from the box. Babies!?!... It was too dark for digiscoping so I ran in and grabbed my V-Lux camera and waited expectantly by the box. Moments passed before the female arrived with most of a Brown Anole hanging from its beak. She posed for two quick images before flying out of sight into the brush to the left of the box.


Eastern Screech-Owl chick , Florida, Leica V-Lux camera 5/4/09


I looked immediately to the box and sure enough a fluffy youngster appeared at the entrance.


two Eastern Screech-Owl chicks waiting on food, 5/4/09


Then another appeared. The box entrance was stuffed with fluff as was, but it wasn't over. There was bill-clacking and jostling and before I knew it a third little fluffer had forced its way into the crowded box entrance. It was an hilarious scene, although I was afraid they might be stuck that way for life!


and one more makes three... Leica V-Lux image, 5/4/09 Florida

belated spring observations!

One of the exciting things about spring, is being able to watch the natural landscape around you change. Through my job I bounce around a lot during spring migration, but it seems no matter where I land these changes are evident.
male Northern Cardinal sings on territory


Sometimes it's a subtle change like when a common local species begins to sing, and other times it's a bit more flashy! Either way these changes are readily apparent for any wishing to take notice.


Blackbirds digiscoped with Leica APO Televid 82 spotting scope & D-lux 4 camera
Red-winged Blackbirds may be the local king of dramatic displays. This widespread bird can be seen almost anywhere in the US and they almost dare you to NOT notice them with their showy displays.


male Red-winged Blackbirds flash their red epaulettes in showy territorial displays


Herons & Egrets rarely display away from nesting colonies, but it is hard not to notice the dramatic color changes in their exposed skin when they move into their high-breeding condition. Note the dramatic differences in the two adult Tricolored Herons below digiscoped on the same morning just feet apart.

adult Tricolored Heron in typical plumage digiscoped in Galveston, TX 4/2009

Note the electric blue skin on the face on the Heron below!

adult Tricolored in high-breeding condition, digiscoped Galveston, TX, 4/09

Shorebirds like a Willet have comparatively drab plumage year round, adding only brown barring on the undersides and dark streaks and bars on the back feathers during breeding season.

"Eastern" Willet, digiscoped with Leica APO Televid scope & D-Lux 4 camera


However, what they lack in splashy colors they more than make up for in behavior and song. When displaying, nearly all shorebirds partake in elaborate flight displays with loud, drawn out songs. It seems these birds vocalize all day long and will often perch high on short shrubs, trees, power-lines, whatever... A very pronounced departure from their typical behavior of feeding and resting at the water's edge!

"Eastern" Willet digiscoped atop a shrub at the marsh edge, Galveston, TX 4/09
These few sample images proving spring was in the air, were captured through my scope in just a couple hours on my way to the Galveston Featherfest vendor display area. A nice distraction before officially going to work for the day! ;)

Tuesday, June 23, 2009

Recent Anniversary for Leica


Leitz Optics Works, 1913, Wetzlar, Germany

It's now been 5 years since I was approached by Leica and asked to be their representative to the birding community. My answer was an immediate & resounding "Yes!" as I knew all about the quality of the products as a seasoned birder. I was not, however, very familiar with the rich optical history of the company. In 2007, I had the fortunate task of assisting with organizing displays celebrating Leica's (originally Leitz) 100th anniversary of producing commercially available binoculars.
Leitz Binocle 6x18 binocular, 1907


Leitz had been producing premium, precision optics (mainly microscopes) in their Wetzlar, Germany plant (top) for nearly 60 years when they introduced their first commercially available binocular on May 14, 1907. The resultant Leitz Binocle 6x18 was the first binocular introduced and it was followed by a number of similar products to include the Leitz Binodal 6x21 (1908 - 1919), and the highly stylish little Gallilei (below) in 1912.

Leitz Gallilei binocular, 1912


As today, these early Leica binoculars were praised for their high quality imaging and in World War I the US Navy borrowed these optical treasures from US citizens as part of their "Eyes for the Navy" program. Like the Leitz Binominia below, each borrowed binoc was engraved with a serial number and cataloged by the US Navy for return at the end of the war.

Leitz Binominia 4x16 binocular, 1914
If the binoculars had not been lost, each was returned to the original owners with a single US dollar bill and a note from the then Assistant Secretary of the Navy.... future US president, Franklin D. Roosevelt!
The early Leitz binocular line included more than smaller, low-powered models though. Large 12x60 binoculars showed up starting in 1910 and the classic brass bodied 10x50 Aviodix (below) were manufactured for the military beginning in 1917.
Leitz Aviodix 10x50, brass-bodied binocular, 1917


Not surprisingly, Leitz pushed the envelope of technology, and by 1927, more contemporary-looking models of porro-prism binoculars like the Leitz Binuxit 8x30 were commercially available.

Leitz Binuxit 8x30, 1927

The stylish Leitz Amplivid really changed the path of the Leitz line-up forever though. This amazing 6x24 roof-prism design (1955) offered a revolutionary wide-angle view of greater than 600 feet at 1,000 yards! This incredibly well-received product, marked the end of porro-prism models at Leitz.

Leitz Amplivid 6x24 binocular, 1955

Following the huge success of the Amplivid, Leitz developed its first model of the famed Leitz Trinovid. Named for the latin root "to see" (-vid), the trinovid introduced three novel (Trino-) innovations to the industry when first introduced in 1957 which has been copied ever since:

1) slim construction

2) superior ergonomics

3) true internal focus system

Leitz Trinovid I prototype, 1955

These first generation models were short lived and were soon replaced with the more familiar, slightly shorter 2nd generation models. Due to the limited run time, these early Trinovids are a big hit amongst collectors (be sure to check your attics thoroughly!)

Leica Trinovid BN 10x42

The amazingly popular, sleek, leather-bound 2nd generation Trinovids remained in the market place for over three decades, until the robust 3rd generation Trinovid hit the market in 1990.

With a new name, Leica went to the marketplace in the mid 1980's and asked consumers and industry leaders what they wanted to see in their binoculars. It seemed serious optics users wanted a more robust, completely waterproof product that could handle any elements one might throw at it. One thing that wasn't apparent in this early survey though, was a demand for close-focus. The earlier Leica Trinovid BA binoculars focused to only about 18 feet, however in response to market demand, (especially birders) Leica made a rolling change in the Trinovid line in the year 2,000. The newer Leica Trinovid BN now close-focused to ~6-9' depending on the model in question.

This trend continues today and demands for lighter weight products have been answered by the Leica Ultravid BR line (the most waterproof binocular in the industry today), which also had significantly improved light transmission over older Trinovids. As recently as 2007, the latest round of inovation (the Leica Ultravid HD line) now allows users to send water droplets sailing with a flick of a wrist. Handy if you're like me, and don't have sense enough to get out of the rain!

Friday, June 12, 2009

glamour and pageantry at the rookery

Great Egret digiscoped through a Leica APO Televid 82 spottting scope

Each spring Herons and Egrets perform complex, ritualized displays in order to attract a mate. When they enter this "high-breeding" state they grow specialized feather plumes and the bare skin between their bill and eye intensifies to a near fluorescent coloration. In Great Egrets this skin changes from its normal dull yellow (above) to a brilliant "electric" lime-green variant.

Great Egret displaying, St. Augustine Alligator Farm
The Great Egret above was performing a beautiful display to my eye and it was one of the few I saw at this rookery (taken in late April '09 at the Florida Bird & FotoFest in St. Augustine) that hadn't attracted a mate and at first I couldn't figure out why...
digiscoped with Leica APO Televid 82 & D-Lux 4 camera
But after watching a bit more some odd behavior may have explained the situation. Odd poses as seen above are certainly not helpful when vying for the attention of a potential mate. Despite the lovely pose struck below, it just loses something when you let your tongue hang out to the side... Some guys just don't get it! ;p
digiscoped w/ Leica APO Televid 82, Alligator Farm, St. Augustine, FL
Fortunately, others do figure it out. The bird below looking coy, washed in golden evening light below will almost certainly succeed. As you know, presentation is everything!
Great Egret digiscoped at sunset, May 2009
When "the dance" is performed properly, a mate is attracted and ritualized pair bonding follows. The suitor below arrives at the nest site and presents its mate with a stick....
Great Egret pair courting at nest, St. augustine, FL, April 2009

After successful courting and nest preparations, the "honeymoon" comes to an end and the arduous task of caring for young begins. A rewarding task none-the-less.

Great Egret with chicks @ nest digiscoped St. Augustine, FL 5/09

Great care must be taken to insure the young hatchlings have enough food to eat obviously but they must also be protected from the heat, predation, etc. An adult Great Egret feeds its young at the St. Augustine Alligator Farm rookery in the image below.

digiscoped through Leica APO Televid 82 mm spotting scope, 5/09
If the adults fail to build a suitable nest, provide enough food, shade, or any of the other requirements, you don't have to look far to see what's in store for the kids.

American Alligator digiscoped St. Augustine 5/09

Typical of southern rookeries, many Alligators were lying in waiting beneath active nests anticipating a quick bite.